The first "Guided Tour" on my site, and the first pano from Mesa Verde.
Read MoreFall 2014 - Big East Overlook
This will be a 2+ Gigapixel pano when completed. Unfortunately I probably won't have time to finish post processing until winter. The initial stitching work processed 2,280 images into 3 panoramic's, each with 5 layers. So far about 8 person hours, and almost 400 CPU hours. I've narrowed it to 2 pano's, and each of those to 3 layers, will be attempting to blend those six layers into a final image. So far in, it's looking very promising. -Click the image below to see it a 1080p resolution.
Fall 2014 - Sam Branch Falls
Scroll Down to see the Pano from down in there?

Fall 2014 - Graveyard Falls
Here's a teaser, hopefully I'll have time to stitch the 3 pano's I got today soon. Leg's need a break from hiking, but I've got great venue's lined up for tomorrow so for now I'll just buck up and take the shot.

And here's the full Panoramic!
Fall 2014 - Leaf Lookers
I love taking pictures of leaf-lookers come to town, enjoying the fall weather and Asheville Buskers. Scroll down, or see the gallery here.
He obviously approves of the skills being shown
Always fun at the flat iron

I think she's happy
They're fans
I love my town
He's to cool to hang out, but the music is just too good to leave
Fans
Taking pictures of people taking pictures
I think they're mesmerized by the musician
Don't go there!
What would a day in downtown Asheville be without a hula-hoop

He's not a fan, unusual to see this face in Ashevegas

Hurry, all the local's J-walk
Enjoying the day
Friends hang'n downtown
Fall 2014 - Day1
Sunset tonight from the pool deck at aLoft hotel. I won't bother telling you all the problems with this picture, but thought I'd share it anyway. - Share to Facebook Here
2014 Fall Vacation - Day 1
Your not gonna believe the sunset pano I got on my first night of vacation!
Sunset 2014.10.13 - aLoft Asheville NC
Experiments in Small Business - The Web Site
Creating a professional web presence requires your own Web Site, and your own Web Domain Name. The domain name is the address of your web site that starts http://www and ends in one of the Top Level Domains (TLD). The original four TLD's (.com .net .org and .gov) have been expanded to include two-letter country codes (.us .ca .tv etc). More recently several industry specific TLD's have been introduced. You want a .com address if at all possible, your customers will remember this by default. The other original TLD's are well know and fairly easy to remember, but most of the newer domains will be less well known to your audience and therefore less memorable. I registered my first domain (storey.net) in the late 90's, and I've had several since then (iDiscGolf.net, and the sub-domain mike.is-a-geek.com) all of which I eventually let go.
Finding a Domain Name
I did a simple search for "Domain Name Search Tool", and found whois.com. which is a web site that makes it easy to find a non-regersted domain. This site also allows you to offer someone cash for a domain if it's already registered, but I'm cheap so that's not an option. At 46 characters SurroundSightGigapixelPanoramicPhotography.com is a bad idea for so many reasons. No one can remember it, it wouldn't fit on a business card, and eMail addresses are going to cause problems for many systems. SurroundSight.com/net/org/us were all taken (darn). I really wanted a short name, and decided to go with the acronym ssgpp. I was able to get a .com TLD, and hopefully it was short enough to remember. I did not use the domain search service to purchase my domain as most hosting companies incorporate the cost of domain registration into the cost of the service.
Selecting a Hosting Company
Let's start off with me admitting I'm a geek. I know how to program, and how to create HTML and design commercial web sites. For this reason, I have very high expectations of my hosting provider. I don't want to have to use "developer tools" or build custom code, I'm paying them to handle that part. I know what is possible and I expect my provider to give me with a high degree of functionality, and make it very easy to use, without requiring any technical work. I have hosted with several companies over the years, and am happy to report that it is truly easier than ever to create and run a professional web site. Hosting companies, like consumer electronics seem to span a continuum of "Highly Customizable" to "Specialized Focus" - think of the continuum from Linux to Windows to Mac. If you know me, I'm a Mac guy, I find my apple products make it easy to do 99% of what I need to do without diving into code and provide a consistent user experience across all of my products. I was looking for this same "it just works" level of functionality in my web hosting company. I want to focus on content, and not have to worry about Javascript, PHP, webJS, wordPress or Jumla. I expect my web site to:
- Work on all popular browsers without any content restrictions
- Adapt to mobile devices without any special work.
- Provide easy to use eCommerce features:
- A solid "Shopping Cart and Checkout" experience
- Manage an inventory, pricing and presentation
- Support for product variants (paper/canvas, small/med/large, etc.)
- Easy integration with a variety of card processing services
- Easy analytics for user and content
These requirements narrowed my focus to several "Template Based" hosting companies, so the decision came down to the appeal of the templates I would have to conform to. Most of the template based hosting companies let you setup a free page (under their Domain) to see how things work. After a brief look at several services, I found SquareSpace and was blown away by their templates, analytics, eCommerce and ease of use.
Creating Content
When creating content on Square Space the template you choose provides you with the framework you need. After selecting your first template, you will have a basic web site with place holders for common content. It should only take a few minutes to familiarize yourself with the Square Space editing tools. It took me about 4 hours to complete my initial web site, by simply filling in content in the sample pages, and uploading pictures. I've spent a lot of time since then customizing the look and feel of my page, and I will share my experience with those efforts in a later post.
Setting up eCommerce
eCommerce was also pretty easy to setup. After selecting a card processing service, and going through their setup process it was very easy to connect that account to my web-site. Once that was done, I setup up the "Shipping" calculators and added a "Shop" page with inventory and product variants. That was all there was to setting up the store. You can find complete guides here.
Experiments in Small Business - Hosting Gigapixel Content
You may have seen previous posts about hosting complex flash with Squarespace. I have had a couple of requests for more specifics about how to setup Amazon web services to host gigapixel panoramic content, so here's a guide:
Signing Up for AWS
When I signed up for SquareSpace hosting, I was hopeful, but pessimistic that their "unlimited" option was truly unlimited. After further investigation I found the limits I was expecting, both in file size, and in bulk uploading restrictions. I'm guilty of not looking extensively at static content options, but AWS had more free space than Google at the time, and the price when I reach limits is very reasonable. Amazon S3 services provide cost effective hosting of static content. You can find out more about their free tier at http://aws.amazon.com/free . There are also links to sign up for the service on that page. You will have to provide credit card information, but the offering includes 5GB of storage with monthly limits on "Puts" and "Gets" that you will likely not hit unless you have content go viral. I'm currently looking into how to set up AdSense from Google so that I can be prepared to offset the hosting costs of a viral event, but the only charge I've incurred so far was when uploading initial content. I uploaded over 100,000 files against an allowance of 20,000 "puts" and my charge that month was $1.08.
Configure a S3 Container
After you sign up for AWS, you will need to log into the AWS Administrative Console using the link in the email confirming your account. Bookmark this url, you'll want to check in regularly. The first thing you will want to do is create a "Bucket" for your content, keep the name short. After creating the bucket, click on the properties button and expand the "Static Website Hosting" section of the properties window. Click on "Enable Website Hosting" and make note of your endpoint url, you'll need it later. It will look something like yourdomain.s3-website-LOCATION.amazonws.com
Uploading Content
You can upload content using the AWS portal by clicking on the "Transfer" button. Their web dialog is easy to use, and I uploaded my first panoramic with it. But it's limited in how well it can leverage your internet connection, and does not offer a "synchronize" option that is critical to keeping a 20,000 file pano-tour up-to-date without having to re-upload all files. To handle these requirements you will need the amazon command line tools. If you're familiar with command line tools like FTP or CP, this one is pretty easy. You'll have to go through a configuration step to provide you account and endpoint information. Once configured, uploading all the files that have changed on my local system is as easy as typing a simple command and my upload speeds were 5 to 10 times faster than the web interface.
- AWS CLI tools download and documentation links: http://aws.amazon.com/cli/
- Configure with the "aws configure" command - details here
- Syncronize your files with "aws s3 sync local remote" command - details here
Embedding Content
I've discussed this before, but now that your content is hosted you can embed it using iFrames in almost any web site. Here is the iFrame I use to embed a pano-tour on my home page.
<iframe seamless allowFullScreen src="https://s3.amazonaws.com/immersive.ssgpp.com/Asheville/asheville.html" style="position:fixed; top:0px; left:0px; bottom:0px; right:0px; width:100%; height:100%; border:none; margin:0; padding:0;">
  Your browser doesn't support IFrames
</iframe>
For more information on iFrames and the attributes to control size, borders, etc. you can look here http://www.w3schools.com/tags/tag_iframe.asp
If you found this post helpful and want to say thank you - I'd appreciate a like/follow on my Facebook page
Experiments in Small Business - The Facebook Page
I've been attempting to get a new career in photography off the ground for a couple of years now, and while I have had some success in building an inventory of somewhat marketable products, I've floundered in my attempt to market these products. I will be posting a series of articles about what I've done (right and wrong) and hopefully give some other folks who are trying to get a simple small business up and running some insight. As I've set things up, I've kept an eye on the reach of my efforts and the numbers seem disappointing. I haven't let limited reach and a financially muted response discourage me, I'm working on this part time, and my business (fine-art prints of gigapixel panoramic photography) is a very specialized undertaking, with an proportionately narrow marketplace. This means I will never have large transactional volume, so investments in sales and marketing are critical, and must be highly cost effective. If you have idea's of how I could do anything better (ANYTHING from my work to marketing and sales efforts) please leave a comment below! It can be daunting when first setting up a new business with an On-Line presence, there are lot's of decisions and sometimes it can be hard to figure out where to start. I started with Facebook, because it was easy and free.
Setting up my Business Facebook page
A lot of you will just skip right over this post, because you already have a Facebook page setup, but for those who are just getting started, setting up my Facebook page is very easy, and has been one of the most effective ways to build an audience (however meager) for my work. Here's a link to my page. There are a couple of things I wish I had done before starting, so let's start you off right.
Your first cover page. The Facebook image size guidelines as of Sept. 2014 show a cover page that is 851 x 315 pixels. When finding and cropping an image, keep in mind that the lower left will be obscured by your profile picture, and the lower center and right are over-laid with your page name and like buttons, so if you have text make sure it is across the top, or top-right of the image.
As of this writing, profile pictures should be 160 x 160 pixels. You should test that your image is recognizable as a "thumbnail" of 40 x 40 pixels. This is the picture your fan's will see next to your posts, so it's probably the most viewed piece of art you will have.
A name - it's easy to do a quick search in Facebook for a name you are thinking of using, spend a few minutes and make sure you can get a name you want, and try not to end up with an extremely long page name (like Surround Sight Gigapixel Panoramic Photography) - it makes it harder for someone to remember the name from a conversation and find your page later.
Now, go get started by logging in to FB and clicking on the "Create Page" option in the pull down menu from the right side of the top menu bar.

You will then be guided through setting up your page. You will select what type of business you have, and provide additional information specific to that type of business. Be as complete as possible, make it easy for people to find you.
If you don't have a Web Page or Business eMail, that's ok for now. Next time I'll talk about how I set up my Web Page and business eMail.
Ok, your page is up, now Invite a few of your close friends to like your page and get some feedback from them. Give it a few days, and don't expect a lot of initial like's. I'll talk about some things I've done to build audience later.
I uploaded a dozen or more pictures to my page as soon as it was up. I was in a rush to get everything up there, and missed a key opportunity to build audience. You should upload a few pictures (just one or two), and make an introductory post (but don't get carried away). You will want add new content to your page regularly to keep your audience engaged. In my case truly new work is fairly rare (if I get twelve marketable pictures in a year I'm doing pretty good) so I have to pace myself in order to be able to post fresh work every week or so.
Next time.... how I selected a Web Hosting company and setup my own web site.
Project Journal: Dali Museum Shoot
Shooting Notes
This was an indoor shoot in the lobby of the Dali Musem in St Petersburg FL. It was a tough shoot, in that while I was allowed to take pictures, I was not allowed to use the tripod or set the robot on the floor in a more central location. I ended up shooting with the robot on the bar while my friend Casie and I enjoyed a beer. There was a lot of traffic, and several frames were paused and reshot.
Using Complex Flash/HTML5 Content on SquareSpace
You may have read my post about the challenges I encountered in hosting Gigapixel and Pano-Tour content with SquareSpace, if you don't have time to follow the link, the short story is don't waist too much time trying. I found several dead ends, and you might be able to find some success, but most likely your better off hosting that content somewhere else. I use Amazon Web Services, they have a free tier that might meet your needs and very affordable options for larger content. Once it is hosted elsewhere you can embed that content in your SquareSpace pages - and they look and work great with your beautiful SquareSpace templates. Here are a couple of pieces of advice on how to use Complex Flash/HTML5 code on your SquareSpace page.
Step 1: Host your Flash or HTML5 content somewhere else. (see this post for details)
Step 2: Create a page and insert an "Embed" component.
Step 3: Click on the "Edit Gear" to enter embedding HTML code
Step 4: Here is a sample <iFrame> element for full-screen (background) images
<iframe seamless allowFullScreen src="https://your-external-hosting/content.html" style="position:fixed; top:0px; left:0px; bottom:0px; right:0px; width:100%; height:100%; border:none; margin:0; padding:0;">
Your browser doesn't support IFrames
</iframe>
Update: Thanks to an update from Ezra - Here is a tweak that makes this work in blog posts:
<iframe src="https://your-external-hosting-file.html" width="600" height="400" frameborder="0" webkitallowfullscreen mozallowfullscreen allowfullscreen>
</iframe>
That's it, if you linked straight to this post, see the Home page, or any of the Gigapixel, Immersive or Tour pages for examples of how this looks on a real SqureSpace page. For more information on iFrames and other attributes to control size, borders, etc. you can look here http://www.w3schools.com/tags/tag_iframe.asp
If you found this post helpful and want to say thank you - I'd appreciate a like/follow on my Facebook page
aLoft Web mock-up
This is a mock-up of the pano-tour being submitted to aLoft Asheville for use in their new web-site.
Hosting with SquareSpace (not)
If you're considering Square Space as a hosting company, and you intend to host any sophisticated content leveraging Flash or HTML5, I would suggest looking elsewhere.
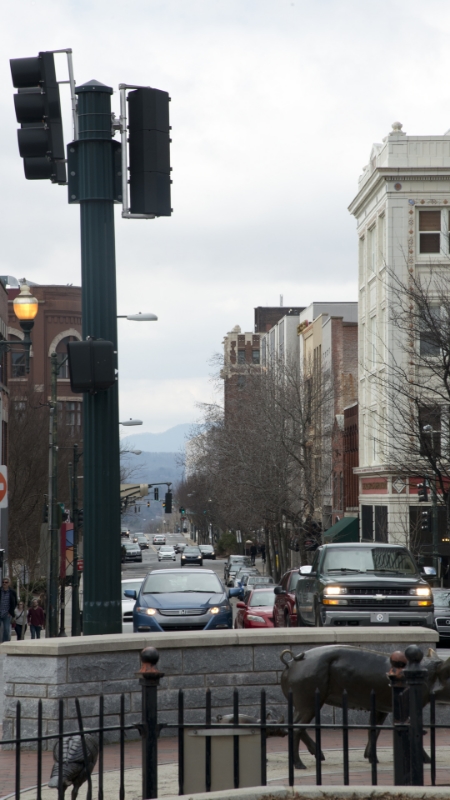
Read MoreGrey February
It's a grey picture, but Asheville show's at least a little color even on the worst day. What really got me about this shot was that I gave up and got in from the cold too early, about 20 minutes after I packed it in the sun came out for an amazing sunset..... lesson learned.
Sunday Scouting
It was a beautiful sunny day, so before heading over to Sam's to play a few games of go in a sunny spot on the sidewalk in front of his cigar store I spent a few hours wandering around downtown, enjoying my town - trying some single-frame photography. I was inspired by my friend Micah to let my eye see the frame more completely. Here's what came of todays playing.

I love the ghost of the old chapel that was exposed when they demolished an old warehouse.
They took down most of the shoe's....
See all the way at the bottom for a new Pano Proof

I ended up finding a new view for a Asheville Panorama. I shot and stitched a couple of quick hand-held pano's - from the proper vantage point this will be a single 250º view..... I'll need an accomplice to go back and shoot here in the spring.
Click the reset icon to see the full picture, or take them to full screen and explore. Neither of them is really super high resolution though.
Above is facing South ~200 Mp,
Below is facing East....
Disappearing Views
I made a quick trip to take some pics of something that won't be there much longer.... look for these to be stitched into an immersive pano sometime hopefully soon.
Good Morning Asheville
Woke up this morning to an amazing sunrise, last time this happened we had an amazing sunset the same evening..... let's see where this goes!
Skyloft Phase2b
This is the second potential from Skyloft, I'm not very happy with some of the transitions, and I think I like the composition of Phase2A much better, so I'm probably not going to put the effort into fixing these transitions. Will take a look at one more stitch, but I think 2a is going to be the one I print.
Skyloft Phase2a
This shoot has me in an unusual predicament, I have 3 potentially good pictures. Round 2 of stitching started with a 65 CPU Hour run of set1 and set3. After initial HDR work on the set3 pano, I found a stitching error so stitch #3 was set3 only, and ran 23 CPU Hours, and another stitching flaw was spotted, so stitch #4 and another 23 CPU Hours and some minor exposure/contrast tuning and I have print candidate #1. The printed crop will remove all of the buildings in the foreground-right, and leave only enough of the building in the fore-left to allow me to include the mountains above them. This crop is slightly over 1Gp. If you have some time, look around and let me know what you find, if you see a stitching flaw, or if you find a crop that you think is particularly striking.